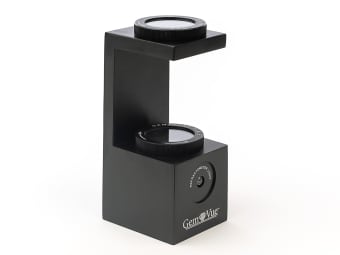
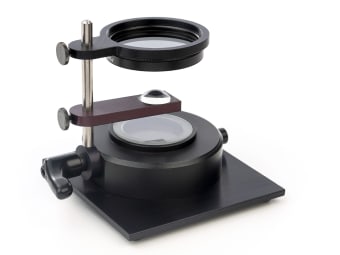
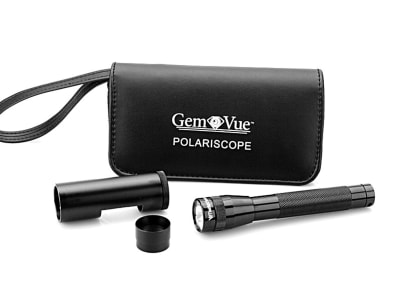
What is a polariscope?
A polariscope is one of a series of tools that helps identify gemstones and minerals. It can observe minerals, faceted gems and even gems in settings; however, these objects must all be translucent or transparent and allow light to pass through.
A polariscope is one of the first items a student gemologist will find in their starter equipment, and it is a critical tool in determining a gemstone's identity. A polariscope can be routinely used with other gemological tools to narrow the range of possible gemstone identifications.
Furthermore, to many experienced gemologists, the polariscope is the first instrument they use, for what it informs them will reinforce subsequent findings on other instruments. This tool can also dismiss certain options immediately.
What does a polariscope do?
The primary purpose of a polariscope is to determine optic character.
Gemstones (and all crystalline minerals) commonly exhibit different
structural forms. These forms result from a gem's original crystal
growth pattern caused by their atomic make-up. This growth pattern
will influence the passage of light through a translucent and
transparent gemstone.
Moreover, each of these structures responds differently when viewed
through a polariscope. This difference is referred to as the optic
character of a gem, and the optic character is one of many identifying
features for determining gem material. Some gems may be singly
refractive, doubly refractive or as is often the case with translucent
materials, a collection of numerous microscopically small crystals.
A handheld polariscope is lightweight, durable and can be used on the road as part of a field gemologist's essential kit; many gemologists also find them adequate for the office, as they never find a need to invest in a more costly desktop model.

The science behind the polariscope
A polariscope contains two polarizing filters. The topmost is called
an analyzer, and the lower part is a polarizer. With a portable
folding polariscope, the analyzer is fixed in the ‘crossed polarizer’
position. This means the light will not pass from beneath the
polarizer and up through the analyzer. This is because they will
cancel each other out by being set at 90 degrees to each other.
This essentially means that looking through the polariscope when
it is sitting over a light source, typically a flat lamp, no light
will be getting through, and it will appear dark. The analyzer on
larger models, particularly desktop models, may be rotated. This
allows a gemologist to apply a few advanced techniques. The polarizer,
or lower filter, is usually stationary in both types.
How to use a polariscope
Step one: Minimize the ambient light where you are or work in a dark area: this will make it easier to observe subtle changes. Place your polariscope over a light source and turn the light on.
Step two: Look down through the analyzer and view the light source. Confirm that it is in the “crossed-polarizers” position and looks dark. Look through either the analyzer or polarizer on its own and confirm that light shows through. This lets us know that because we see no light when looking through both, it is because they are correctly in 'crossed' orientation and are canceling each other out.
Step three: Take your sample (gemstone or mineral), clean it with a cloth and place it in the gem stage. Using tweezers will help hold and place your gem sample. Note that this will only work for translucent or transparent material.
Step four: With the gem in between the polarizer and analyzer, rotate the gem 360° and observe the response. The simplest way to start is by lying the gem on its table facet and nudging it around with your fingers; note every 90 degrees of rotation. This is most likely to give us a response, due to the preferred orientation of the table that most faceters choose. It is also least likely to scratch our polarizer, and we want to extend the lifetime of our instruments.
There are four possible outcomes that you will observe.
1) The sample appears light through the entire rotation. It is an aggregate (A common abbreviation seen in gemological tables will be “AGG”). This means it is a micro-or crypto-crystalline material like chalcedony or chrysoprase, or it is a type of glass.
2) The sample appears dark throughout the entire rotation. It is singly refractive (Commonly abbreviated to “SR”). This means the stone is from the cubic crystal system, also known as isometric, and this includes diamond, spinel, garnet and fluorite.
3) The sample blinks light and dark four times in a 360-degree rotation. The sample may be doubly refractive (DR) or SR ADR. Instead of blinking four times, there may also be a shadow that sweeps over it with the same regularity. This is still a doubly refracting material. This could be any one of the other six crystal systems.
4) The sample may exhibit irregular blinking that appears as snake-like bands that may not touch. The material is probably SR with something known as “anomalous double refraction” (ADR) and the behavior is caused by strain in the material. This generally indicates a paste or glass. One might also see a crosshatching effect that is known as “tabby extinction”. This is another strain effect and is typically seen in synthetic spinel and may also be seen in lab-grown diamonds.
The first two responses require no further tests. Responses 3 and 4 require a confirmation test to determine the true optic character of the sample.

Polariscope Confirmation Test
Step one: Turn the gem stage until the stone appears to be at its lightest point. Be sure the filters remain in the dark position.
Step two: Lift the top filter if it is hinged or peer at the specimen excluding the top filter (the analyzer). Observe the lightest area of the stone and see if there is any change. There are two possibilities:
1) The sample looks noticeably lighter indicating it is singly refractive (SR) or amorphous (glass), and what we have seen is anomalous double refraction (ADR). ADR results from strain in the structure that has distorted the path of light.
2) The sample looks the same or slightly darker, it is doubly refractive (DR).
Conoscope: This article does not cover the use of a conoscope. A conoscope is a glass sphere that is also known as an "optic sphere" or an "interference sphere". It is placed under the analyzer and over the gemstone we are observing. It shows us the interference figure from which we can take a further diagnostic step in identifying the stone as uniaxial or biaxial.
Suggestion:
One final tip: If you are using small portable units,
these can be very useful when combined with a microscope. They are
small enough that they can fit over the sub-stage light and allow a
viewer to observe the gem’s behavior through the microscope. This can
be very helpful in identifying some of the cross-hatching and ADR that
occur, for these are a result of strain in a crystal’s growth that are
typical in some quartz varieties and also certain diamonds.
Note: There are two articles on the polariscope. One focuses on the desktop version of the instrument and this article focuses on the handheld version. Read the other article here for a second explanation to reinforce your understanding. The desktop version includes some more advanced techniques that are not explained in this handheld article. You can try these techniques on a handheld, but until you have some practice, you will find them more difficult due to the polarizers being fixed.

